Deploying a complex Docker stack isn’t nearly as challenging as you think, at least when Portainer is your GUI of choice. Find out how easy this is with Portainer templates.

When you think of deploying a full-stack, containerized application, you probably expect it to be a tedious and complicated task of manually writing a manifest and hoping it deploys correctly. Although developers who are well-versed in YAML and Docker manifests would say it’s not a difficult thing to do, if you’re even remotely new to containers, the process can be pretty daunting.
SEE: Hiring kit: Python developer (TechRepublic Premium)
Fortunately, there are apps like Portainer that go out of their way to make managing and deploying containers exponentially easier than doing so from the command line. With Portainer, you can manage Docker containers, stacks, images, networks, volumes and more, but one of the most impressive features is its ability to deploy a full-stack application from a simple app template.
You’ll find templates for stacks like registries, NodeJS, NGINX, Apache, Caddy, MongoDB, Elasticsearch, SQL Server, Redis, Joomla, Drupal, Plane, Jenkins, Redmine, WordPress and others.
Let me show you how it’s done.
Jump to:
What you’ll need to deploy a full-stack application
The only thing you’ll need to follow along in this tutorial is a running instance of Portainer. I recommend deploying Portainer to a MicroK8s environment and then installing Docker CE on the controller so you add a Docker environment into the mix.
How to deploy a full-stack app from a Portainer template
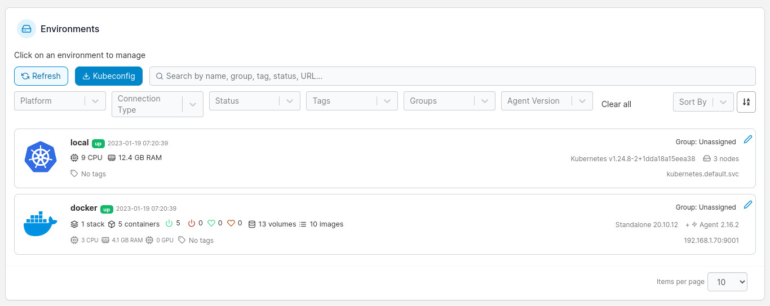
Start by logging into your Portainer instance and selecting the Docker environment from the Environments listing (Figure A).
Figure A
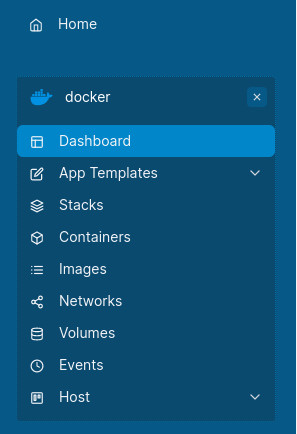
Once the Docker environment is loaded, click App Templates in the left sidebar (Figure B).
Figure B
A listing of the available application templates will appear. Let’s test out the WordPress deployment. Scroll down until you see WordPress (Figure C).
Figure C

From here, there are two ways to go. First, you can click the WordPress entry and deploy the full stack as is. Alternatively, you can click Copy As Custom, which will open the template up for editing (Figure D).
Figure D
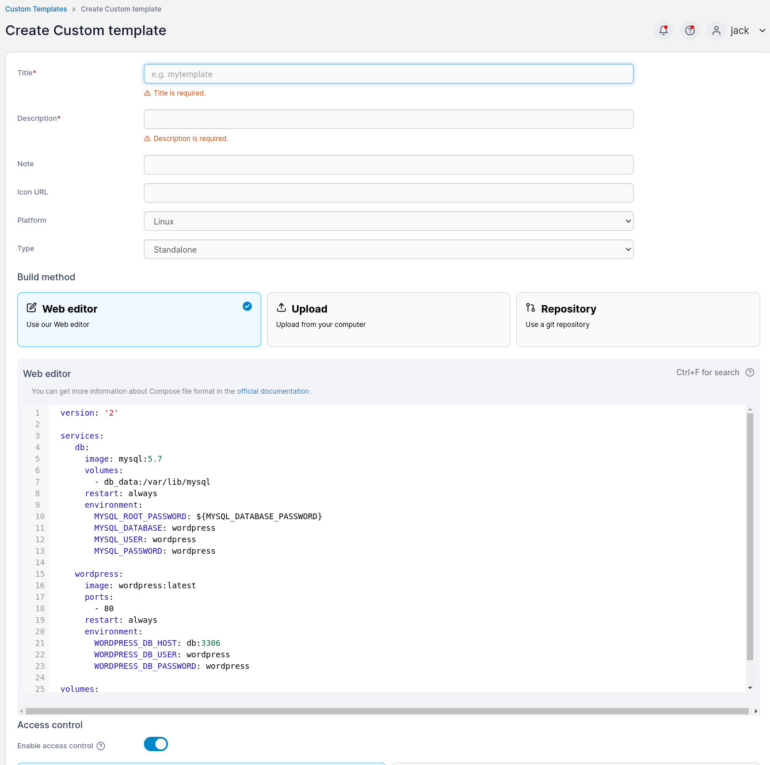
Using the Custom option allows you to edit the YAML files in the Portainer Web Edibot so you can customize the deployment.
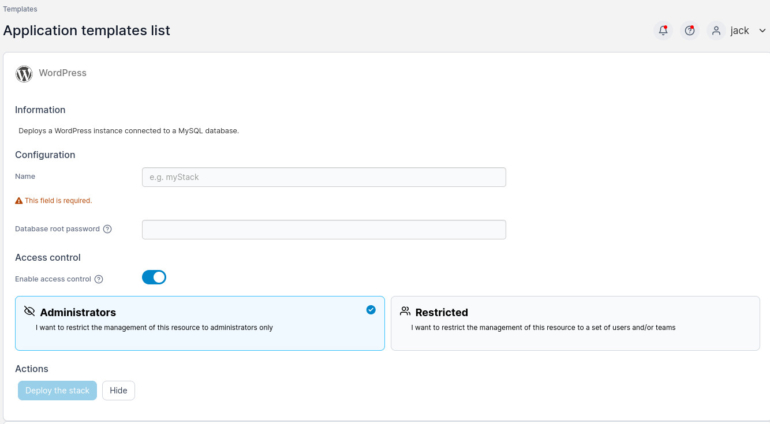
If you simply want to get WordPress deployed quickly, just click the entry in the Templates listing and, in the resulting window (Figure E), give the deployment a name, type wordpress as the database root user password and click Deploy The Stack. If you want to change the password for heightened security, you’ll want to go the custom route. For testing purposes, the simpler approach works fine.
Figure E
It will take some time for the deployment to complete, but once it’s finished, you will be taken back to the Stacks listing. Click on the newly deployed WordPress stack, and you’ll see the published port listed (Figure F).
Figure F
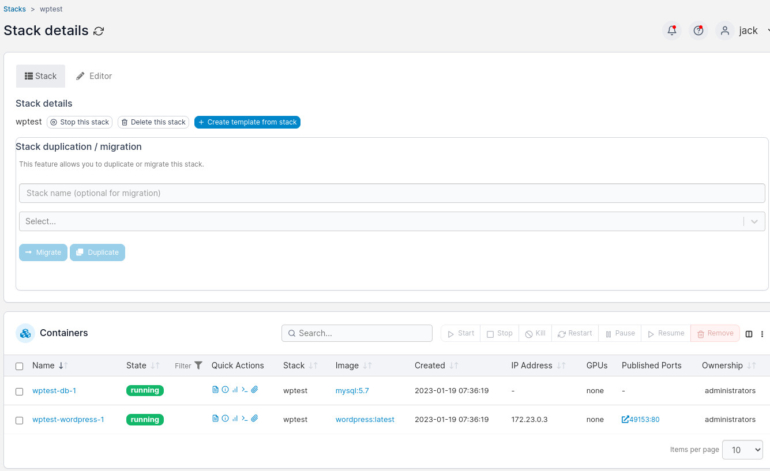
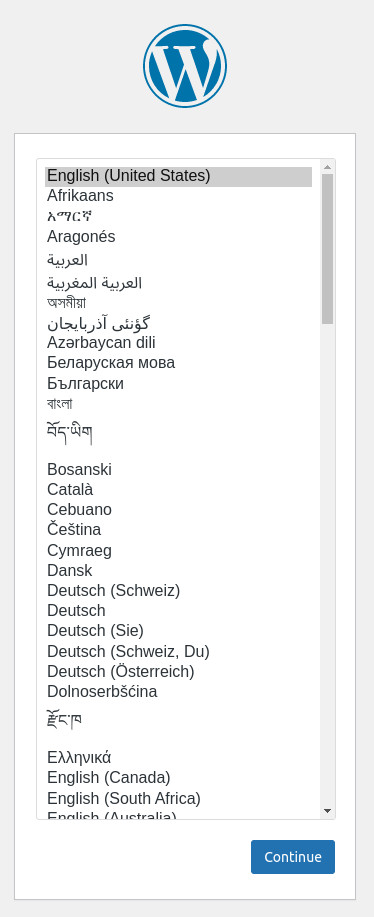
Give the containers plenty of time to spin up and then point your browser to http://SERVER:PORT, where SERVER is the IP address of the controller node and port is the published port you saw when you viewed the newly-deployed stack. You will be greeted by the WordPress installer (Figure G), where you can point and click your way to finishing the deployment.
Figure G
Full stacks made simple
You won’t find an easier way to learn the art of deploying a full-stack application with Docker. Using Portainer greatly simplifies the deployment and management of containers. Once full-stack developers start using Portainer, they’ll wonder how they ever managed without it.
Read next: The 12 best IDEs for programming (TechRepublic)
