With Dropbox Sign, you can send people documents that need to be signed electronically.

If you want to create electronic documents for other people to sign, you can choose from a variety of different tools and online services. One such service worth trying is Dropbox Sign. With this tool, you can prepare and send forms and other documents for people to sign with legally binding electronic signatures.
SEE: Hiring Kit: Cloud Engineer (TechRepublic Premium)
What you’ll need to use Dropbox Sign
To use Dropbox Sign, you just need to upload an existing document or form. You can then prepopulate the form with the necessary text and form fields.
Alternatively, you can add certain types of fields after uploading the document. You’re able to create a template out of any form if you wish to reuse it.
How to use Dropbox Sign in eight simple steps
1. Choose your Dropbox Sign pricing plan
To get started, browse to the Dropbox Sign webpage and click the link for See Plans And Pricing. Choose the plan you want and click the button for Start free trial.
Dropbox offers four different plans for Dropbox Sign. For individuals, the Essentials plan costs $20 per month when billed monthly and $15 per month when billed annually. The Dropbox + eSign plan costs $31.99 per month when billed monthly and $24.99 per month when billed annually.
For companies and teams, the Standard plan costs $30 per user per month when billed monthly and $25 per user per month when billed annually. The Premium plan uses custom pricing based on your needs. A 30-day free trial is available for the Essentials, Dropbox + eSign, and Standard plans.
2. Create your Dropbox Sign account
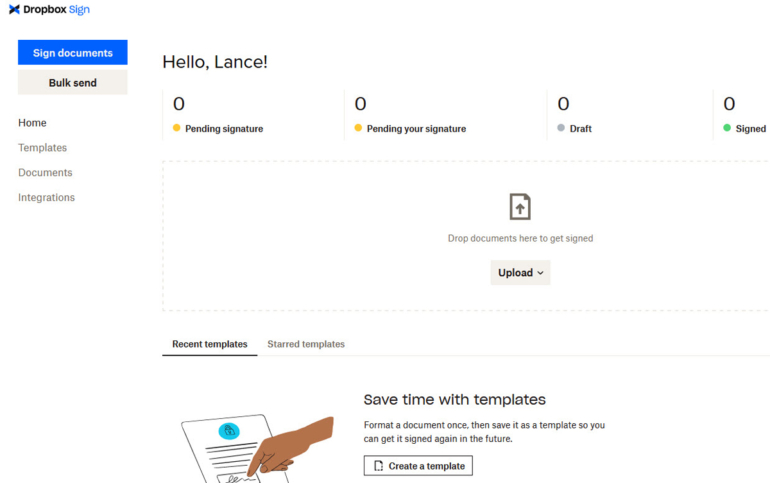
Sign in with your existing Dropbox account or click the link to create a new account. You’re then deposited at the Dropbox Sign home page (Figure A).
Figure A
3. Upload your document to Dropbox Sign
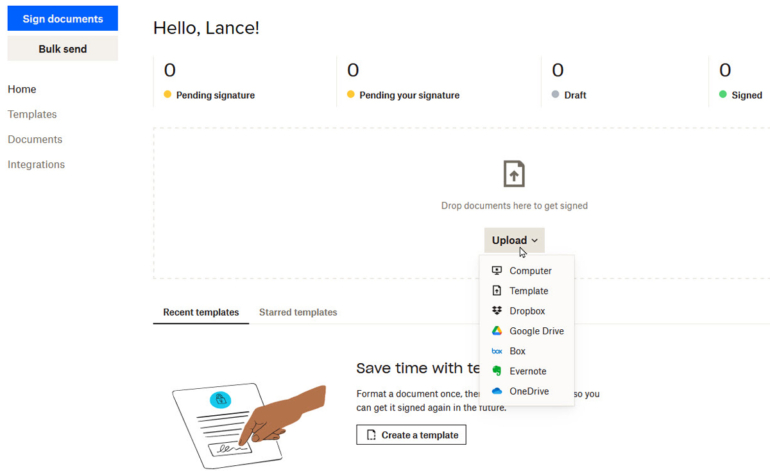
At the Dropbox Sign page, click the Upload button. Choose the location for the document you wish to upload — Computer, Dropbox, Google Drive, Box, Evernote or OneDrive. Browse to and select the file (Figure B).
Figure B
4. Add the signers to the document
Assuming someone other than yourself needs to sign the document, enter the person’s name and email address in the appropriate fields. For the email address, you can import a list of contacts from Gmail.
If more than one recipient needs to sign the document, click the entry for Add Another Signer and then enter the person’s name and email address (Figure C).
Figure C
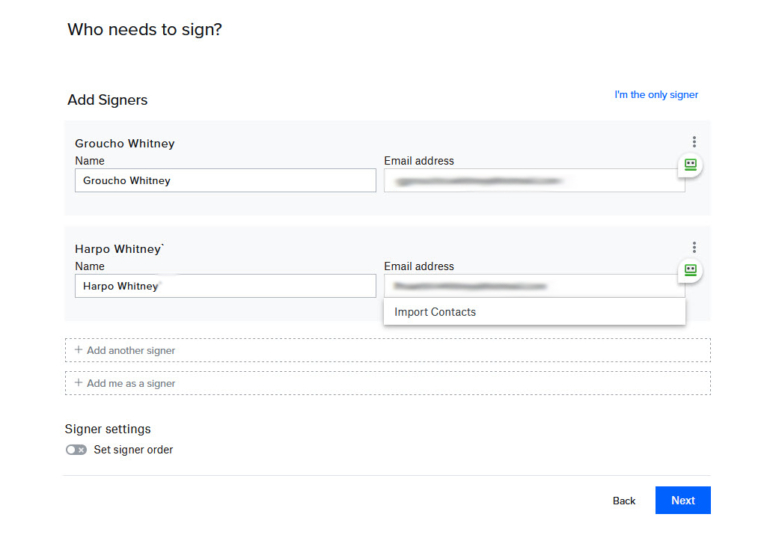
If you need to sign the document as well, select the entry for Add Me As A Signer. Confirm your name and email address.
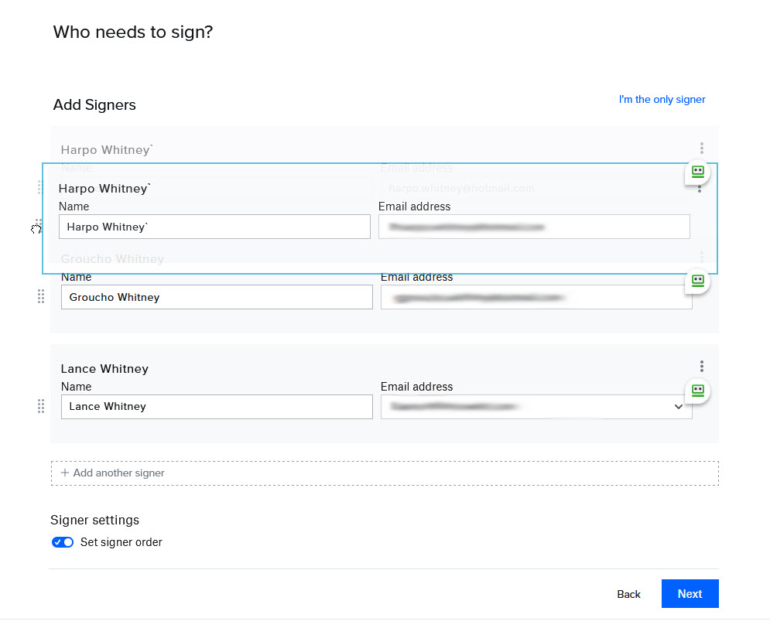
To set a specific order for people to sign the document, turn on the switch for Set Signer Order. You can then drag and drop the names of the different signers to set the order.
When done, click Next (Figure D).
Figure D
5. Prepare the document in Dropbox Sign
The next screen prompts you to prepare the document by adding the necessary fields. With the first signer listed, click a specific field on the left pane and then drag it to the spot in the document where you want it to appear. After the field appears, you can drag it to move it and drag any of the corners to resize it.
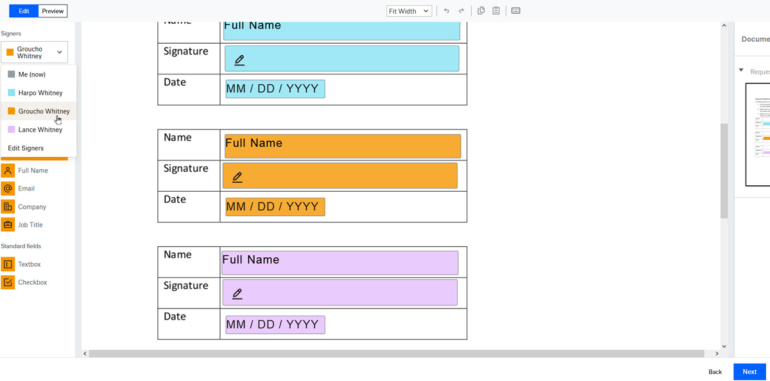
If the document requires text and a signature from more than one person, a dropdown menu at the top of the left pane lets you switch from one person to another. Click the menu and select a different signer (Figure E).
Figure E
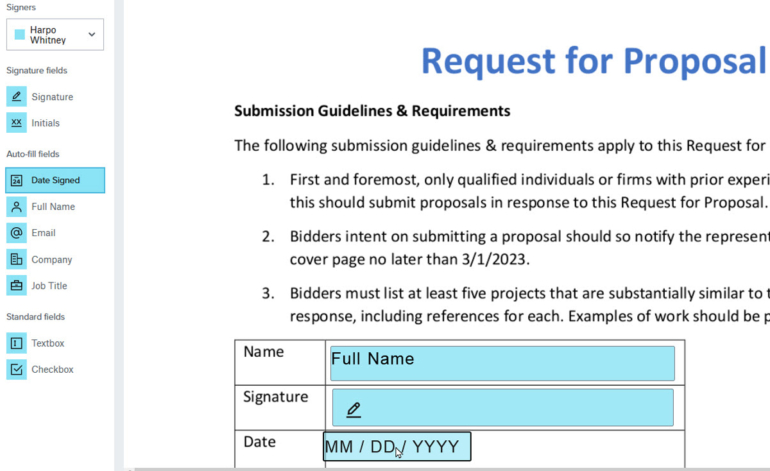
Next, drag and drop the appropriate fields into the form for that person. Continue this process for all the signers.
When done, click Next in the lower right corner (Figure F).
Figure F
6. Review the Dropbox Sign document information
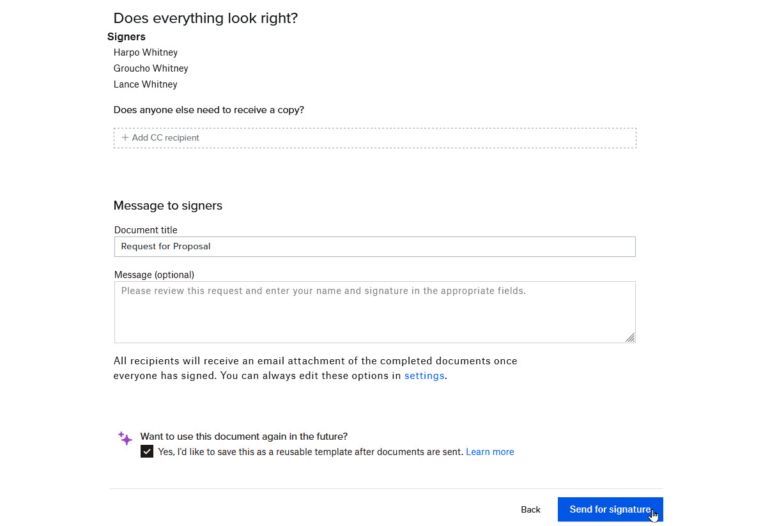
The next screen allows you to review the information for the document. Confirm the names and email addresses of the signers. Add the contact details for anyone who should receive the document. Add a title and proposal.
Finally, check the box to save this as a reusable template if you want to save the document for future use. When done, click the button for Send for Signature (Figure G).
Figure G
7. Save the Dropbox Sign document as a template
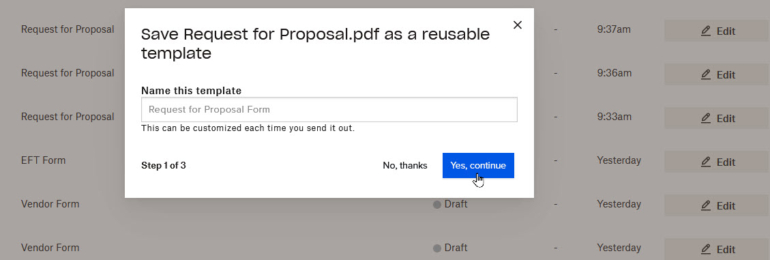
If you opted to save the document as a reusable template, name the template and then tap Continue. Assign a role to each person who would need to sign the document for future use. Add a default message if you wish and then save the template (Figure H).
Figure H
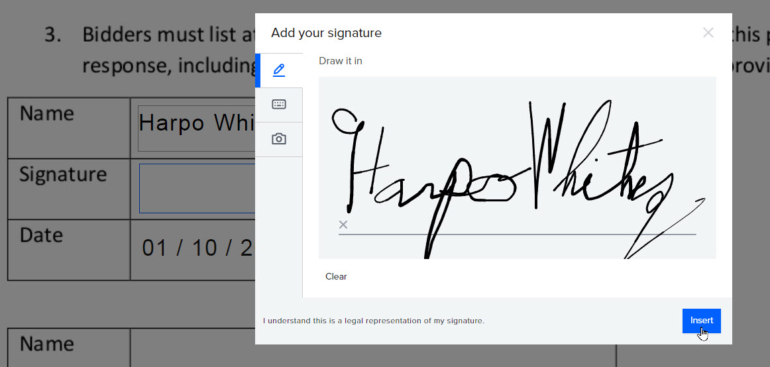
Next, each recipient will receive a link via email to sign the document. Each person clicks the button for Review & Sign, which takes them to the form. Each signer then signs the document in the appropriate field by drawing their signature, typing one using the keyboard or adding one from an image (Figure I).
Figure I
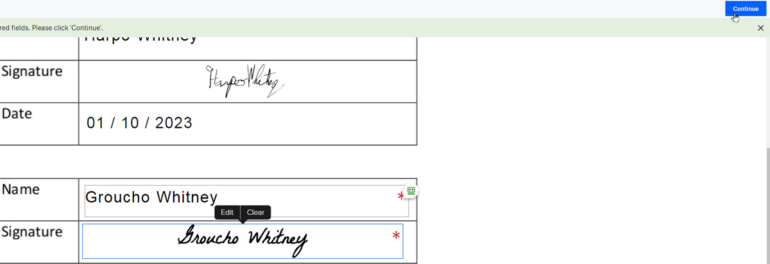
After all the necessary fields have been completed, each person clicks Continue to submit the form and then clicks the I Agree button (Figure J).
Figure J
8. Sign and review the document in Dropbox Sign
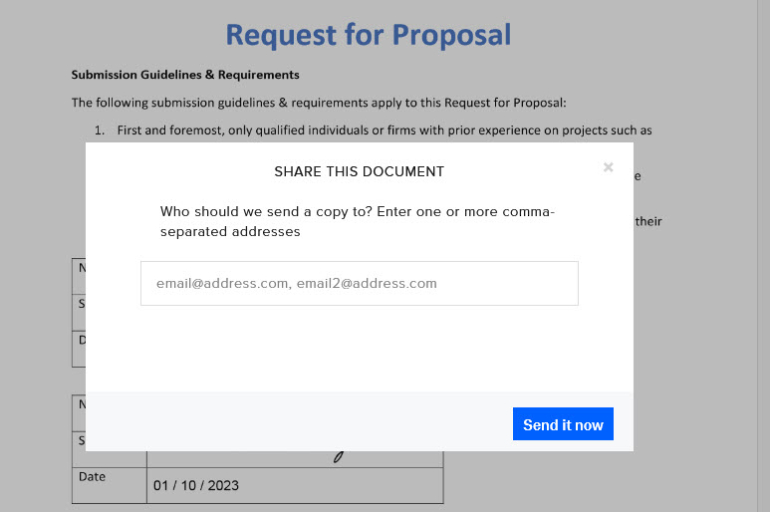
After the other signers have filled out and signed the document, you’ll receive an email prompting you to sign it. Another email will prompt you to review the final document. You can then download and share the document with other people (Figure K).
Figure K
Discover more about Dropbox with these other tutorials from Lance Whitney: How to use Dropbox Transfer to securely share files with other people and how to use Dropbox Backup to back up your files to the cloud.
